Clamp-On Manual Stainless Meat Grinder: No-Power Prep
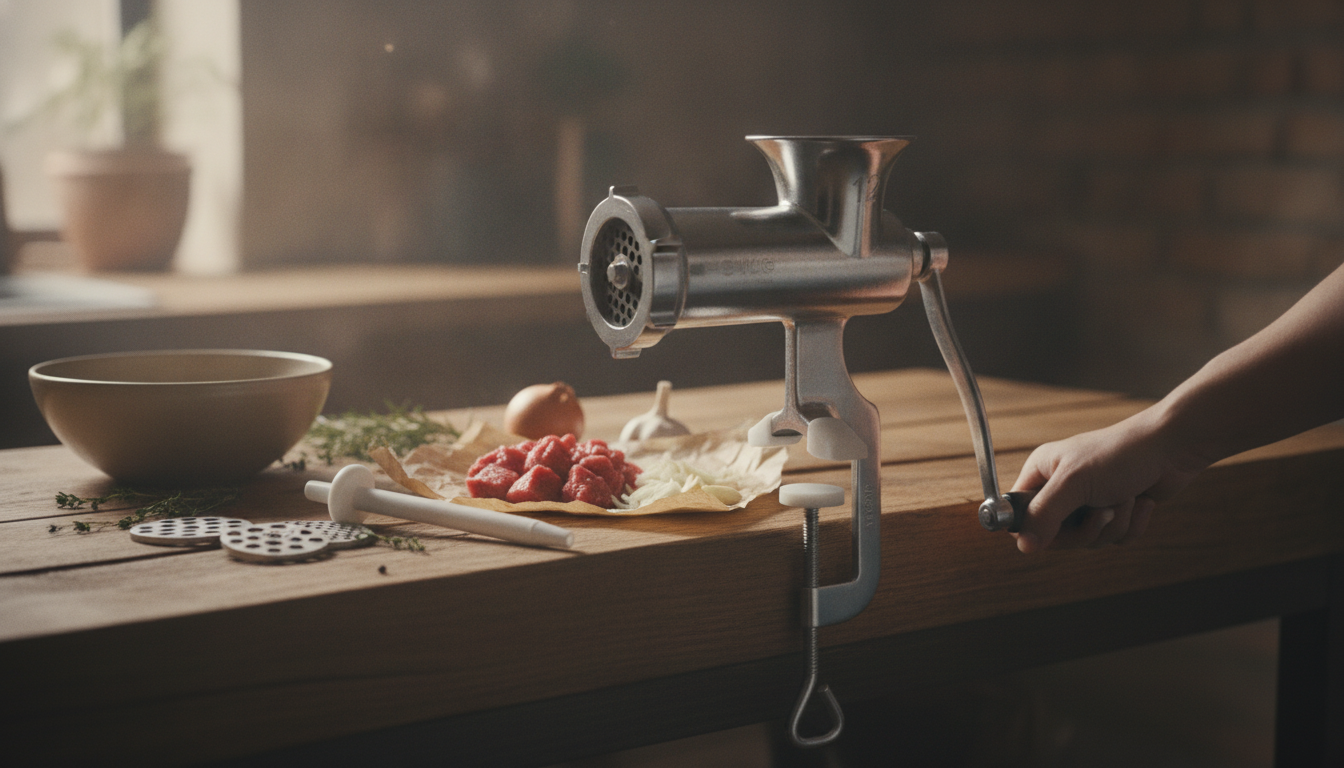
Manual Stainless Steel Meat Grinder with Clamp: Reliable Grinding Without Electricity
A manual stainless steel meat grinder with a clamp brings dependable, electricity-free grinding to the kitchen. The clamp keeps the body steady on a countertop, while stainless steel construction supports durability and easier cleanup. Whether you’re prepping burgers for a weeknight dinner, making a small batch of sausage, or keeping a non-electric option for camping and backup prep, a clamp-mounted grinder delivers control over texture and freshness—without taking up much space.
What a clamp-mounted manual grinder is best at
- Small to medium batches without relying on outlets: Ideal for home kitchens, cabins, RVs, and emergency readiness—anywhere you want simple, hands-on grinding.
- Controlled texture for everyday recipes: Dial in a coarse grind for chili and sausage, or a finer grind for patties, dumplings, meatballs, and fillings (depending on included plates).
- Steady cranking on many surfaces: A properly tightened clamp reduces sliding and wobble, so you can focus on consistent feeding and smooth turns.
Key parts and how they work together
Manual grinders are straightforward, but they run best when each part is seated correctly and kept cold and clean.
- Feed tube and hopper: Guides chilled, cubed meat into the auger. Uniform pieces help prevent clogging and make cranking feel lighter.
- Auger (worm): Pulls meat toward the cutting end. Steady, even cranks usually outperform fast, forceful turns that can mash warm fat.
- Cutting blade and grinding plate: The blade shears; the plate controls final size. For clean cuts, both must sit flat and snug (not skewed).
- Clamp mechanism: Locks the grinder to the counter edge. A stable mount improves speed, reduces rocking, and lowers hand fatigue.
- Handle/crank: Your leverage point. A comfortable grip and smooth rotation matter most during longer batches or denser mixes.
Benefits of stainless steel for food prep
- Corrosion resistance: Stainless steel generally handles moisture better than many other metals, supporting longer service life when dried well.
- Less odor pickup: Compared with more porous materials, stainless surfaces are less likely to hold onto strong meat and spice aromas after washing.
- Quicker cleanup: Oils and proteins tend to release more easily when washed promptly with warm, soapy water and a non-abrasive brush.
Quick checklist for choosing the right fit
Before buying, match the grinder to your counter, your batch size, and the recipes you actually make.
| Item to check | Why it matters | Quick tip |
|---|---|---|
| Clamp opening & pad | Prevents slipping and protects surfaces | Mount on a stable board if the counter edge is thin or rounded |
| Included plates & blade | Controls grind size and cut quality | Coarse for chili/sausages, finer for patties and dumpling filling |
| Material & finish | Affects longevity and cleanup | Dry completely after washing to avoid spotting |
| Disassembly steps | Determines how likely it is to be used often | Choose a model that breaks down quickly for routine cleaning |
- Plate options: More plates usually mean more control. Confirm what’s included on the listing (coarse vs. fine).
- Ease of disassembly: The faster it breaks down, the more likely it is to be cleaned promptly and used frequently.
- Stability and leverage: A longer handle can reduce effort; a firm clamp and balanced body reduce wobble.
- Intended foods: For sinewy cuts or tougher blends, prioritize a sturdy mount and a sharp, well-seated blade/plate setup.
How to grind meat smoothly (and avoid jams)
Most grinding problems come from warm meat, inconsistent prep, or a loose mount. A few habits make the process noticeably smoother.
- Chill the meat and parts: Cold fat stays firm and cuts cleanly. Briefly chilling the auger and plate can reduce smearing.
- Trim and cube: Remove thick silverskin and tough connective tissue, then cut into even strips or cubes that fit the feed tube.
- Clamp firmly: Tighten until the body doesn’t shift when you turn the handle. If your counter flexes, mount on a sturdy cutting board.
- Feed steadily: Use the pusher (if included) instead of fingers, and avoid packing the tube too tightly.
- Grind twice for finer texture: Run a coarse pass first, then a finer pass (when plates allow) for a more even mix.
For raw-meat handling and cleanup guidance, follow established food-safety recommendations such as USDA FSIS resources on cleaning and sanitation and safe handling of ground meat.
Cleaning, sanitation, and storage habits
Troubleshooting common issues
Product options in stock
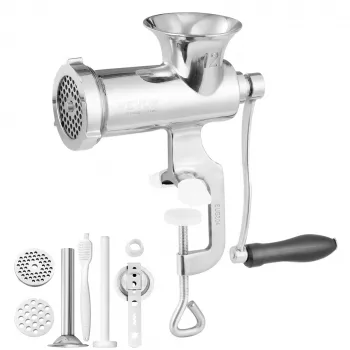
- Manual Stainless Steel Meat Grinder with Clamp ($109.01): A clamp-mounted, stainless steel manual grinder suited for controlled, small-batch grinding and stable countertop use. Check the listing for included accessories (plates, pusher, stuffing tubes) and clamp compatibility with your counter thickness.
- Vintage Resin Vase ($92.01): A simple countertop accent that pairs well with a prep-friendly kitchen setup, especially if you like keeping a tidy, styled workspace.
- Muscle Relaxation Toolkit for Total Tension Relief – 3-in-1 Bundle for Deep Muscle Relaxation ($307.99): A comfort-focused option for recovery after hands-on kitchen projects, including long prep sessions and extended cranking.
FAQ
Does a clamp-mounted manual meat grinder damage countertops?
It can leave marks on softer surfaces if clamped directly. Place a thin cutting board or silicone pad between the clamp and the counter, and tighten only until the grinder stops shifting.
Should meat be frozen before grinding?
Meat should be very cold, not solidly frozen. Chill it until firm so fat cuts cleanly; fully frozen meat can strain the auger and make cranking unnecessarily difficult.
How often should the blade and plate be replaced or sharpened?
Sharpen or replace them when cranking becomes noticeably harder, the texture turns mushy, or the grinder starts tearing rather than cutting. Careful cleaning and completely dry storage can extend edge life significantly.













Leave a comment