Night Photography Settings: Simple Steps & Long Exposures
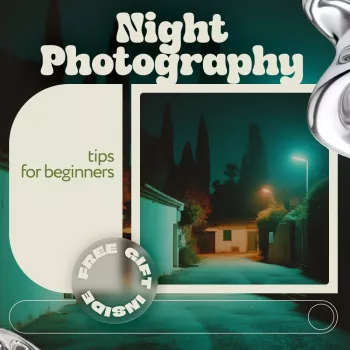
Night Photography, Made Simple: Step-by-Step Settings and Creative Long-Exposure Ideas
Night photos don’t have to be a guessing game. With a few reliable settings, a steady setup, and a repeatable workflow, you can capture clean city lights, sharp stars, and smooth light trails without frustration. Our team uses the same practical sequence every time: stabilize first, lock focus, set a sensible “first-draft” exposure, then refine with the histogram so bright signs and streetlights don’t blow out. For more guidance, see STUDY GUIDE FOR PHOTOGRAPHY TIPS AND TRICKS.
Before the first shot: the quick setup that prevents 90% of night-photo problems
- Stabilize the camera: a tripod is ideal. If you’re handheld, brace against a wall or railing and prioritize a faster shutter speed.
- Use a 2-second timer or a remote: it reduces shake. If you shoot a DSLR, mirror lock-up can help even more.
- Shoot RAW when you can: you’ll get better highlight recovery and cleaner noise reduction in editing.
- Disable flash for scenes: it often flattens the atmosphere and overexposes nearby subjects at night.
- Clean the front element: tiny smudges can turn streetlights into big flares.
- Focus once, then lock it: use manual focus or single-shot AF, confirm sharpness, and avoid repeated hunting in the dark.
A beginner-friendly step-by-step workflow for low light
Step 1 — Choose the scene (and simplify)
Pick one clear subject (a skyline, bridge, or street corner). Clean compositions are easier to expose at night because fewer bright points compete for attention. For further reading, see Capturing the Wilderness: Tips for Better Canoe and Kayak ….
Step 2 — Set exposure mode for consistency
Use Manual (M) for repeatable results. Shutter Priority can work, but bright signage and headlights can fool the meter from shot to shot.
Step 3 — Pick a starting aperture
Use f/2–f/4 for handheld shooting or subject separation. For cityscapes where you want more depth (and starburst-style lights), start at f/8–f/11.
Step 4 — Choose shutter speed based on motion
If you want to freeze people and cars, try 1/60–1/250. If you want motion effects—light trails, glowing water, moving clouds—work in the 1–30 second range.
Step 5 — Set ISO last
Raise ISO only as needed to reach a workable shutter speed. Your goal is the lowest ISO that still supports what you’re trying to create.
Step 6 — Take a test frame and read the histogram
At night, highlight clipping is the most common issue. If streetlights and signs are blowing out, shorten shutter speed first (or lower ISO), then re-test.
Step 7 — Refine focus and confirm at 10x
Zoom into playback and check crisp edges on your main subject. Once it’s sharp, keep focus locked so the camera doesn’t shift it between frames.
| Scene | Aperture | Shutter Speed | ISO | Focus Tip |
|---|---|---|---|---|
| City skyline (tripod) | f/8–f/11 | 2–10s | 100–400 | Manual focus on a bright edge; confirm at 10x zoom |
| Street scene (handheld) | f/1.8–f/2.8 | 1/60–1/200 | 800–3200 | AF on a high-contrast sign; recompose carefully |
| Car light trails (tripod) | f/8 | 5–20s | 100–400 | Focus on roadway markings; switch to manual to lock |
| Night portraits with ambient light | f/1.8–f/2.8 | 1/100–1/250 | 800–3200 | AF on the nearest eye; watch for subject movement |
| Stars (basic wide-angle) | f/2–f/2.8 | 10–20s | 1600–6400 | Manual focus using live view on a bright star if possible |
Camera settings that matter most at night (and what to avoid)
If you want a deeper, plain-English refresher on how exposure works, we like Cambridge in Colour’s exposure tutorial. For long-exposure basics and practical examples, Canon’s long exposure guide is a helpful reference.
Long exposure, step by step: light trails, glowing water, and clean night cityscapes
Creative night shots you can nail on the first outing
A guided path from “random settings” to repeatable results
Helpful picks from our store
- Night Photography Tips for Beginners – Step-by-Step Ebook Guide to Low Light Photography, Camera Settings, Long Exposure & Creative Night Shots (a structured, scene-by-scene reference you can keep on your phone).
- Muscle Relaxation Toolkit for Total Tension Relief – 3-in-1 Bundle for Deep Muscle Relaxation (helpful after long tripod sessions, hikes to viewpoints, or late-night editing).
- Luxury High-Back Recliner Sofa Set (a comfortable home base for reviewing takes and editing longer sets).
FAQ
What are the best night photography settings for beginners?
For a tripod cityscape, start at ISO 100–400, f/8–f/11, and 2–10 seconds. For a handheld street scene, start at f/1.8–f/2.8, 1/60–1/200, and ISO 800–3200; take a test shot, then adjust shutter speed and ISO using the histogram to protect highlights.
How do you avoid blurry night photos?
Stabilize with a tripod and use a 2-second timer or remote; if you’re handheld, brace yourself and keep shutter speed up (often 1/60 or faster). Lock focus after you get it, confirm sharpness at 10x zoom, and reduce vibration with mirror lock-up (DSLR) and by disabling stabilization on a tripod when appropriate.
How long should a long exposure be for light trails?
Most light trails fall in the 5–20 second range, depending on traffic speed and how bright the streetlights are. If the frame is too bright, shorten the shutter or use a smaller aperture; if it’s too dim, lengthen the shutter before raising ISO.












Leave a comment